Interface Overview
This page introduces the main interface and entry points of the software.
Launch screen
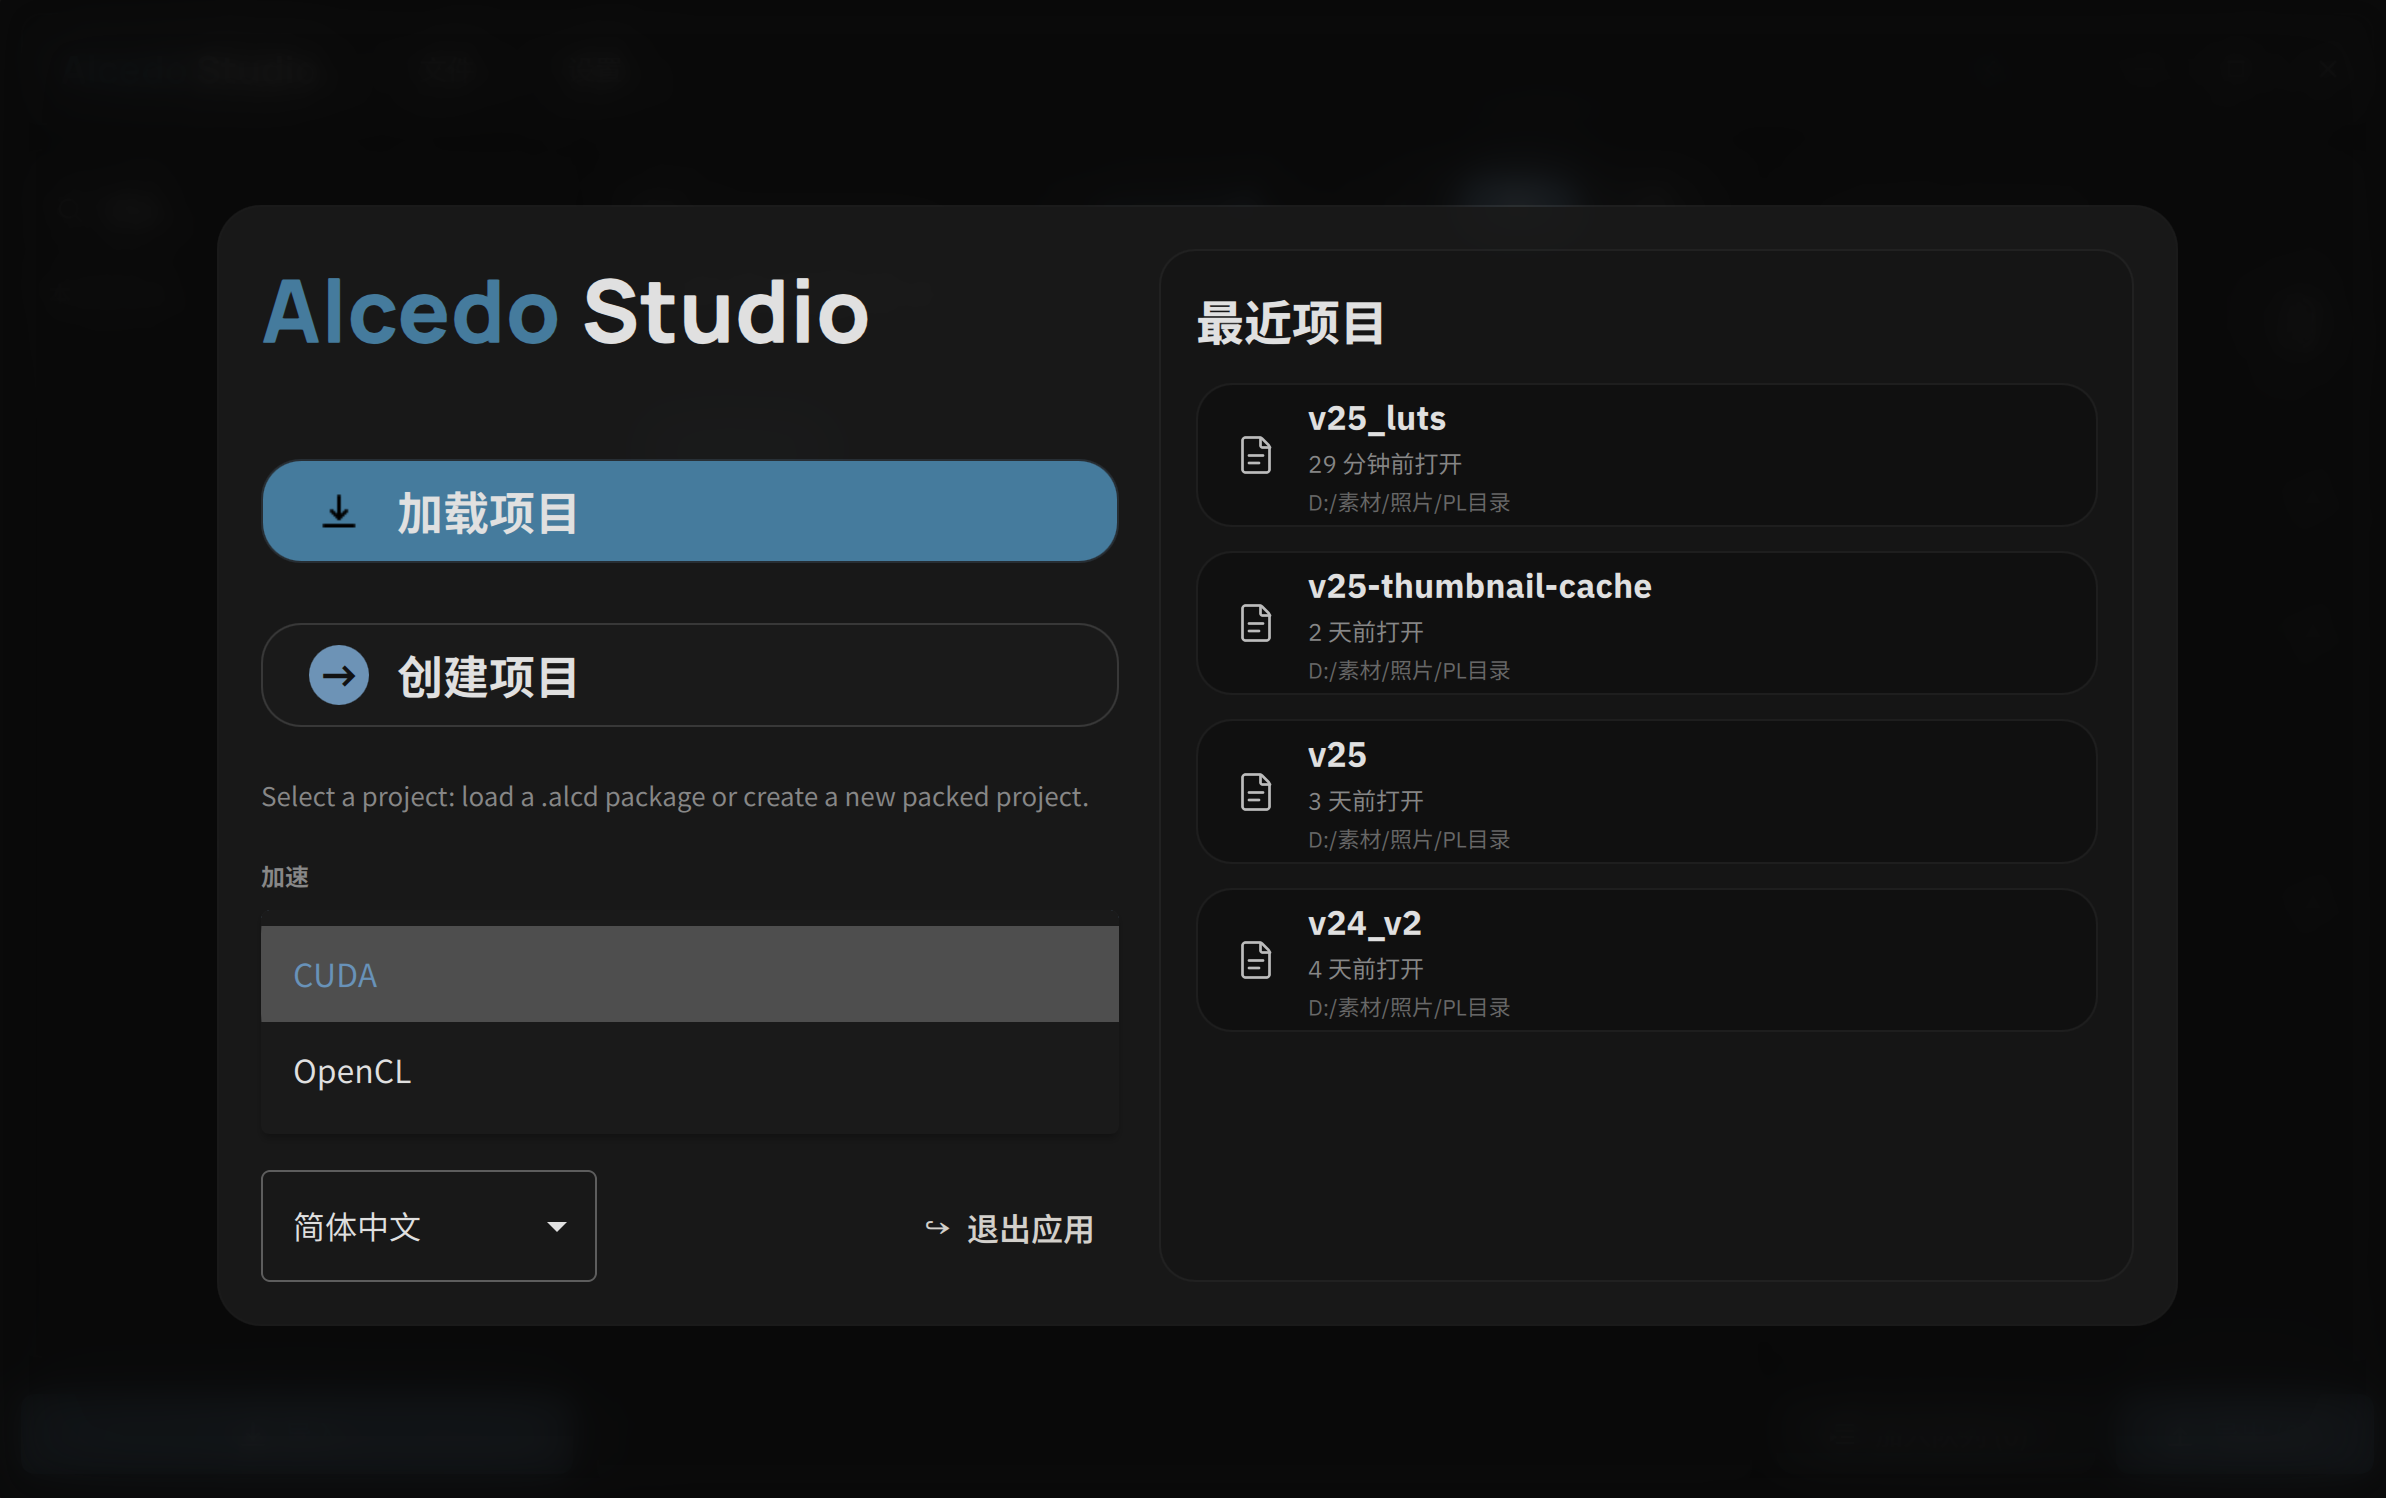
The launch screen appears on startup. Here you can choose the interface language (currently Chinese and English) and the GPU acceleration backend, and load or create projects, or open recent projects directly from "Recent Projects". Clicking "Create Project" opens the new-project page, where you enter a project name and storage location.
Album main screen
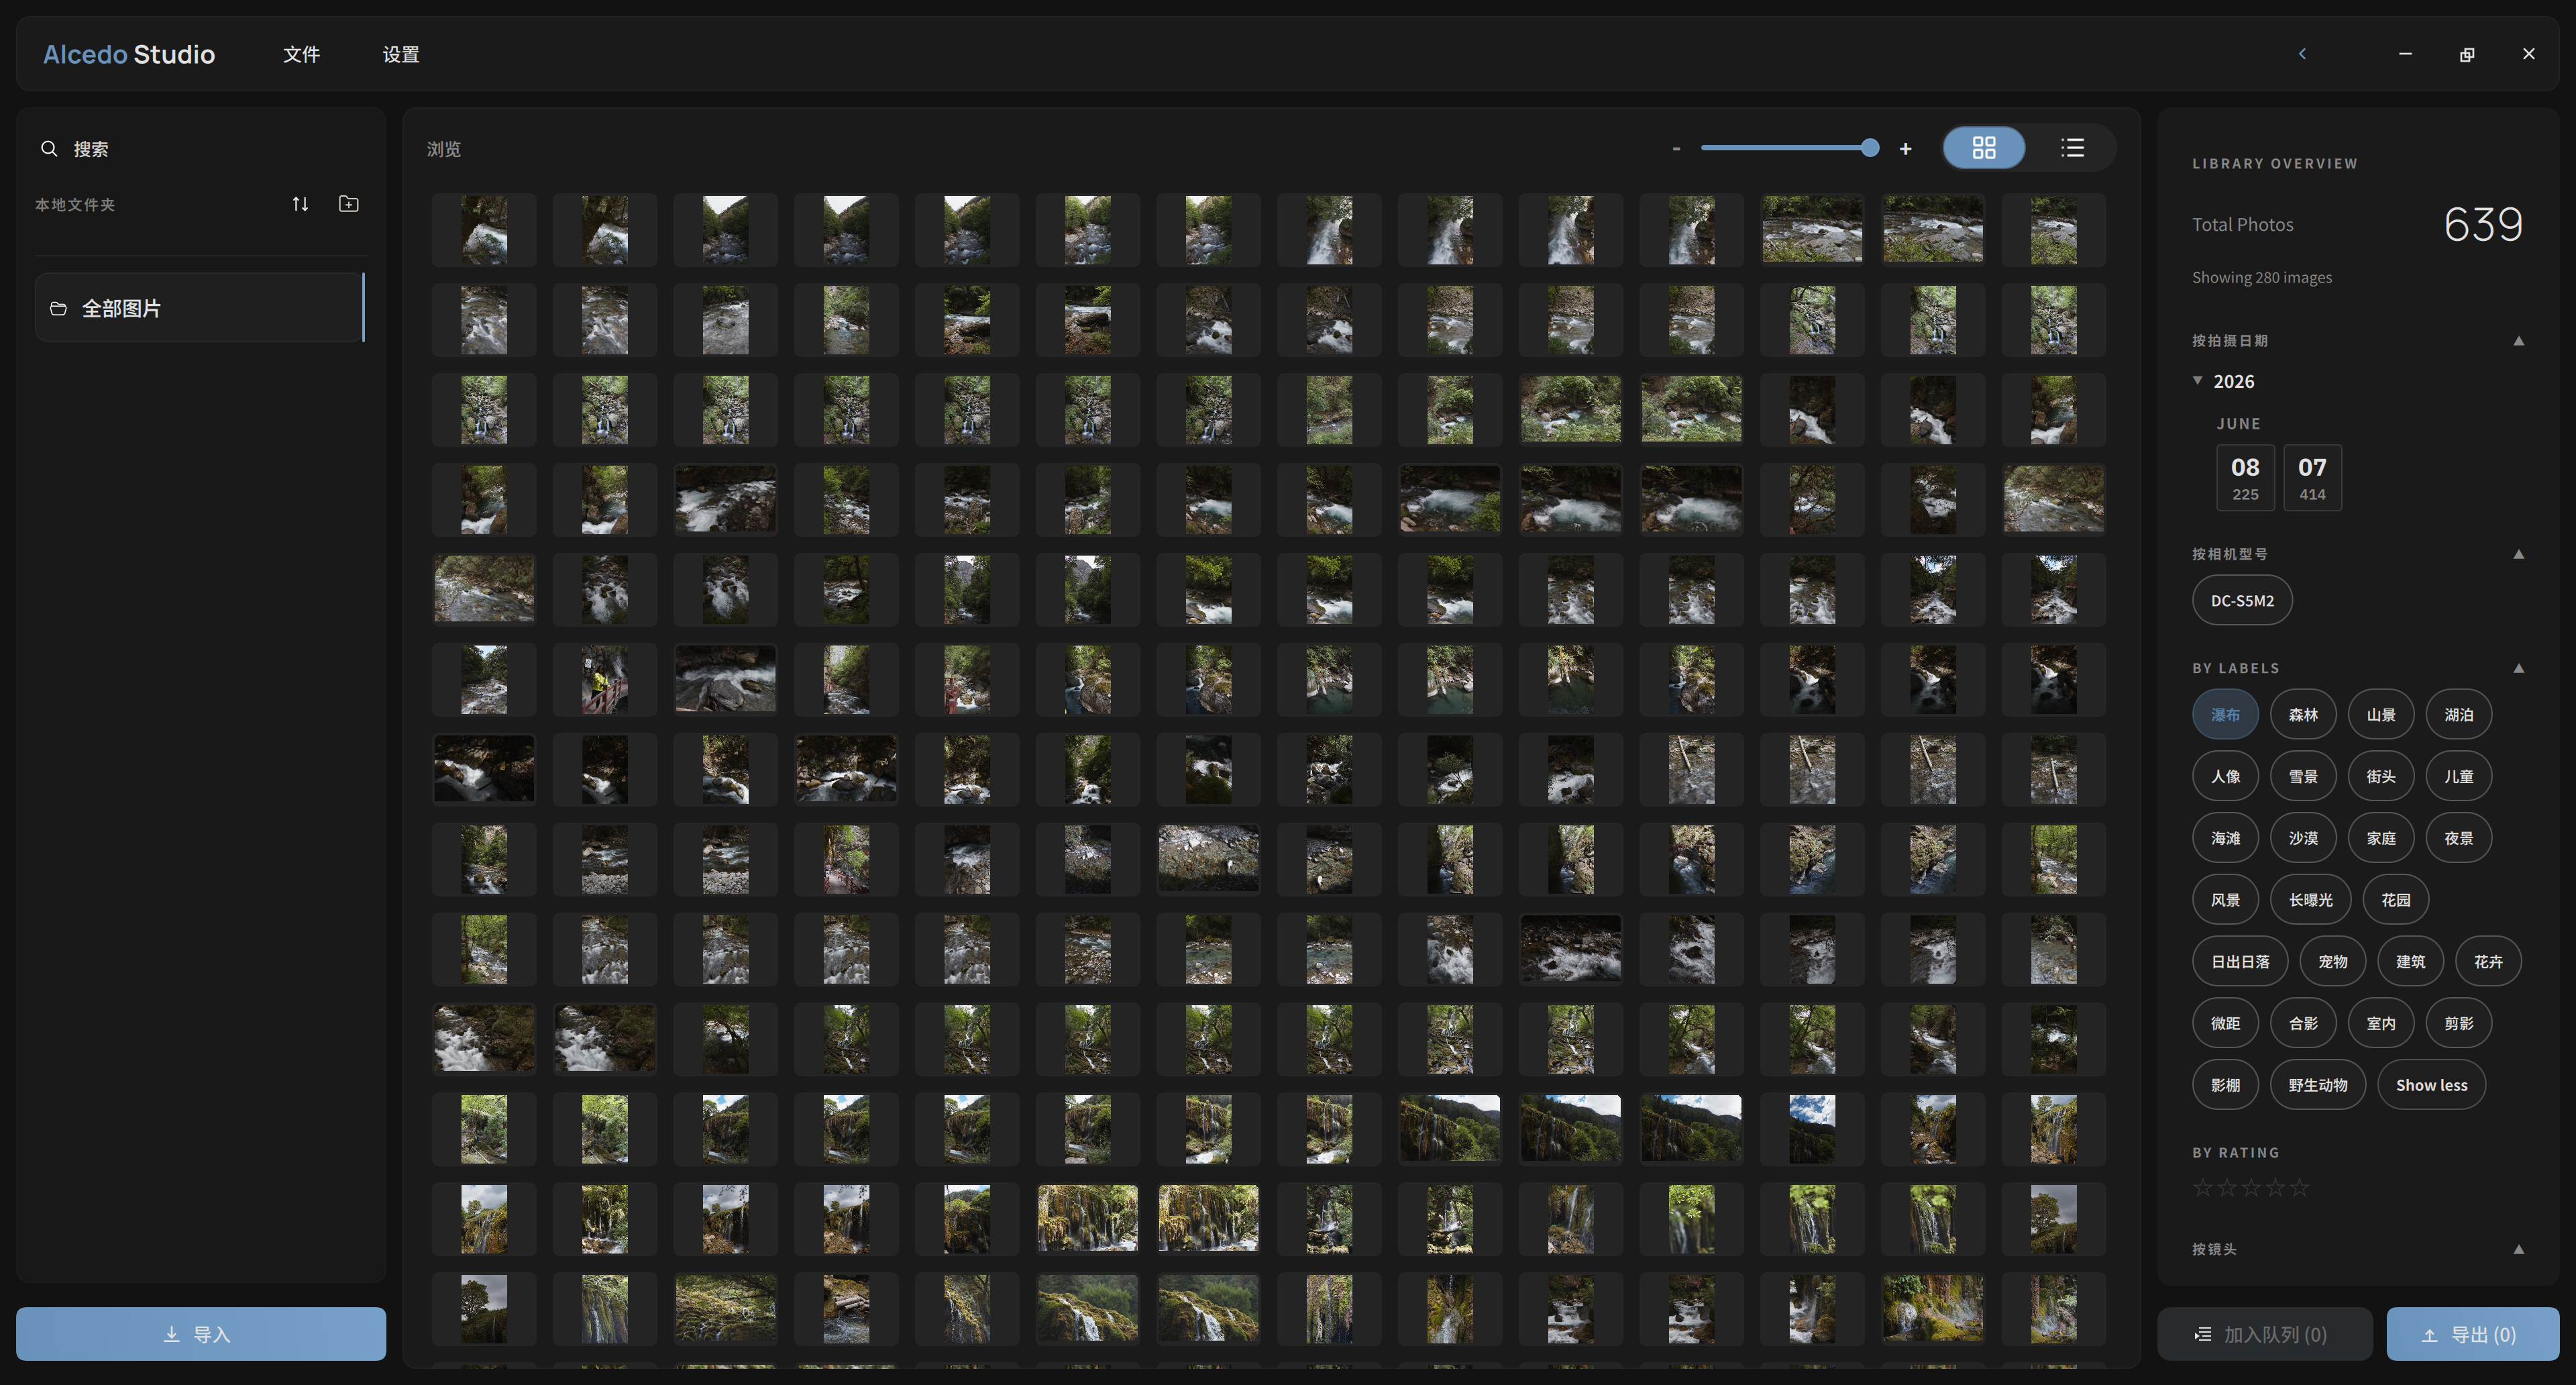
Opening a project enters the album main screen, a three-column layout:
- Left "LOCAL FOLDERS": the collection and folder list, with the "Search" tab on top opening global search (see AI search and fuzzy search), the "Import" button at the bottom importing images, "New collection" creating a collection, and "Delete collection" available for a selected non-root folder.
- Middle browser: thumbnails shown in grid or list view, zoomable with the slider above or
Ctrl/Command+ wheel; double-clicking an image enters the edit screen, and right-clicking opens a context menu (rating, Details, copy / paste adjustments, delete, add to other collections, etc.). - Right inspector: shows "LIBRARY OVERVIEW" statistics and filter entry points, including filtering by capture date, camera model, tags, rating, lens, and more; with an active search, a "SEARCH FILTER" card shows the current query and can clear it.
Edit screen
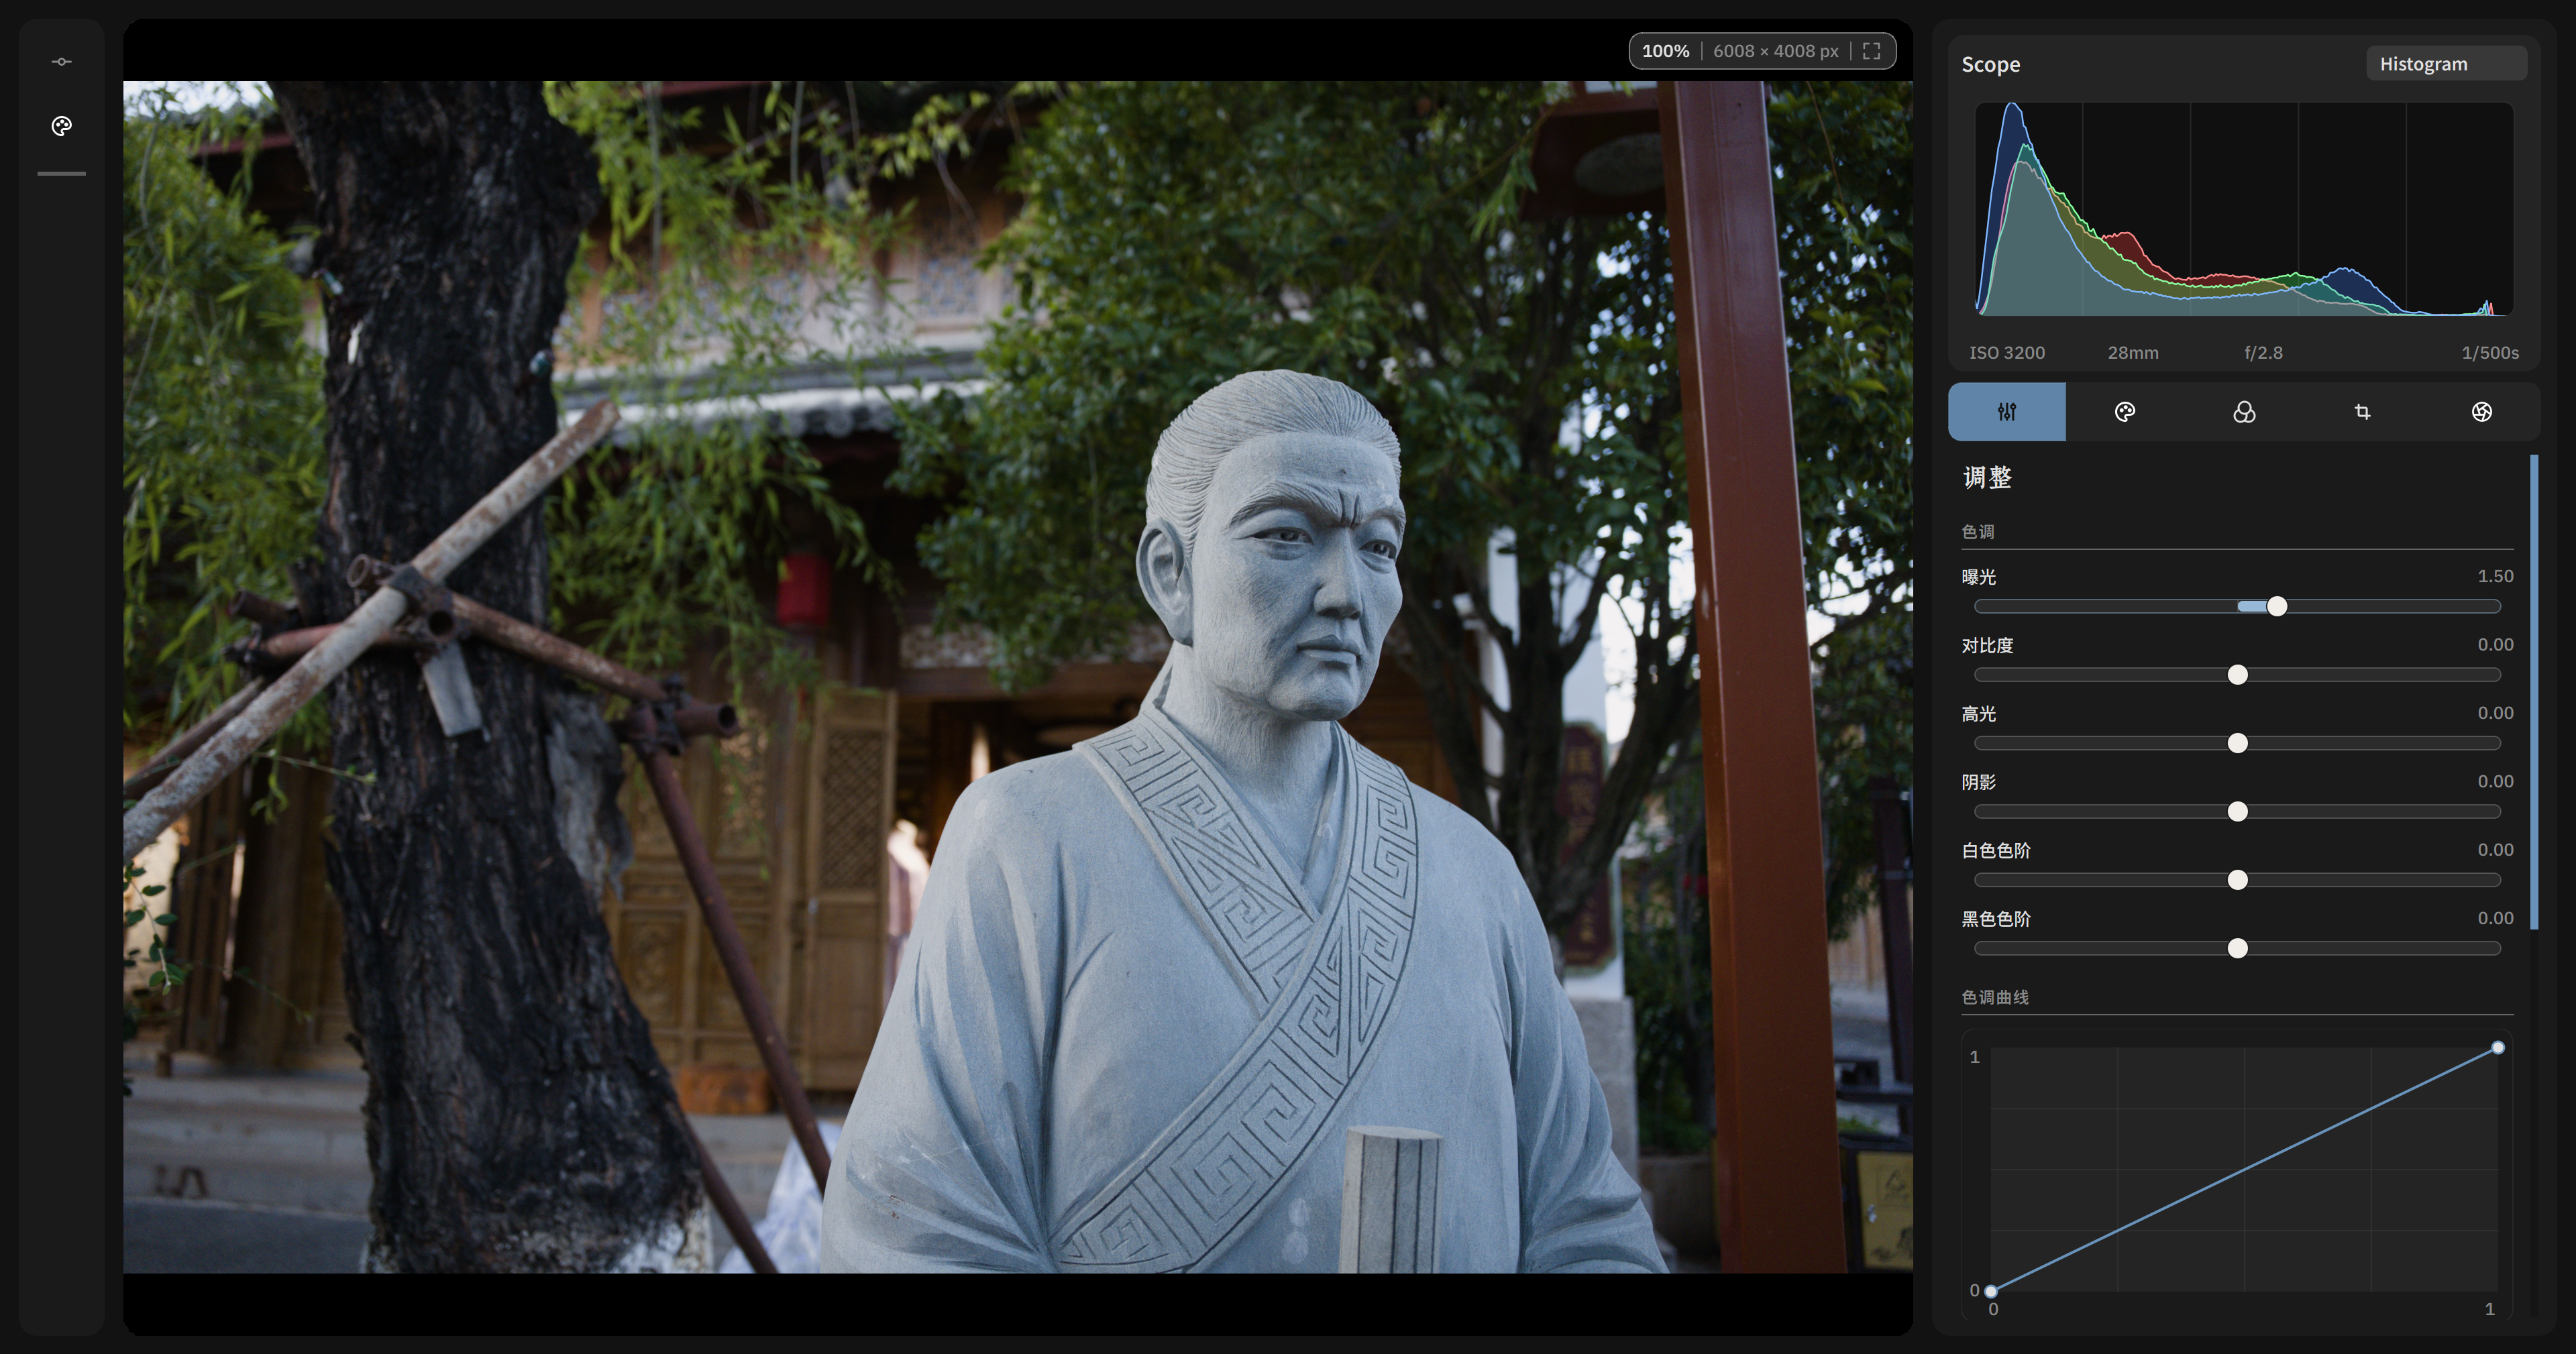
Double-click an image in the album to enter the edit screen, the main screen for image adjustments. The left rail switches between Edit History (the commit graph of the current Version) and Versions (the named branch list); the right side is the parameter adjustment panel; the center is the image preview. Panel usage is covered in Edit History and Versions (UI).
Export
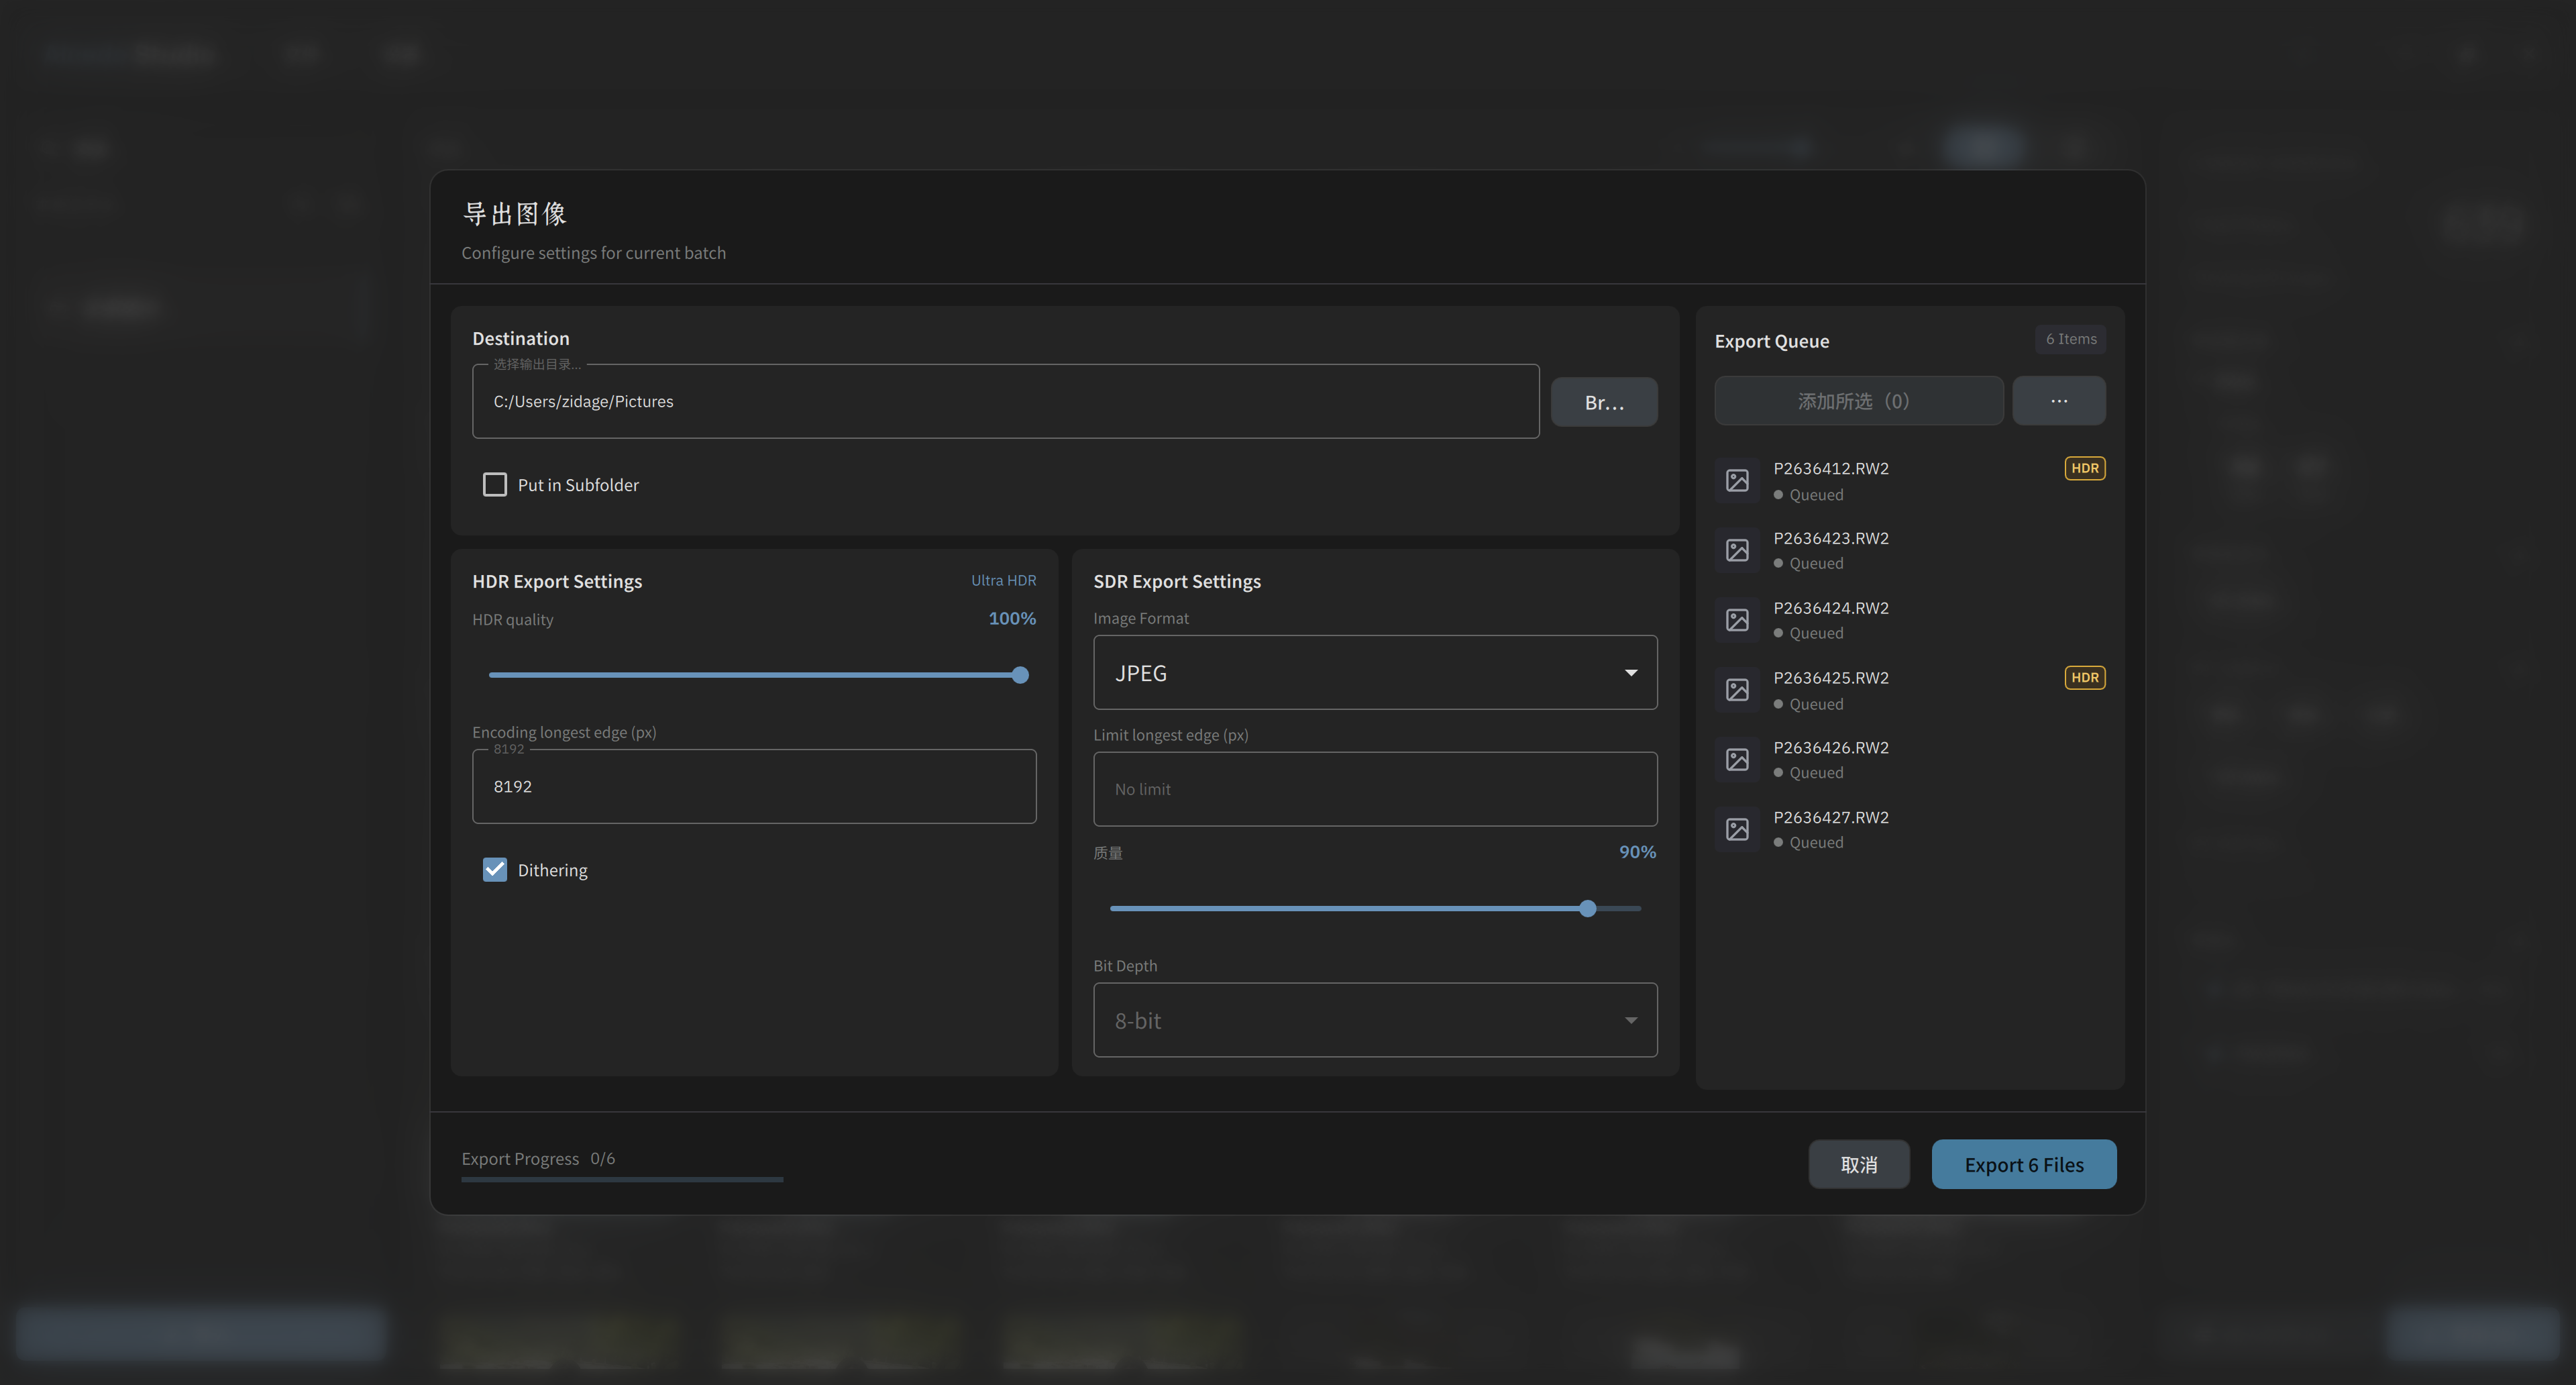
Select images and click "Export" to open the export dialog, where you can choose the target directory, format, resolution, bit depth, and more; the right side shows the export queue and its status. After editing, closing the editor back to the album page saves all changes automatically.
Settings and AI
Click Settings on the toolbar to open settings. AI-related settings are split into two paths: Local Content Recognition for downloading and activating local vision models and configuring import-time label generation preferences; Advanced Content Analysis for creating API provider profiles, choosing models, and configuring how descriptions, ratings, and rating reasons are generated. Full entry points are in AI features overview and API provider configuration.
The album's left tool area also provides an Advanced Content Analysis entry. After opening a project and selecting one or more photos, click the entry to run API analysis on the current selection; the entry stays disabled when no photos are selected.